Projects Module
Module Overview
The very essence of web2Project is the ability to effectively manage projects. The Project Module is the foundation for Task and the heart of the system. Almost every other module in the system uses the project module in some sort of capacity to pull or share information.
Creating a Project
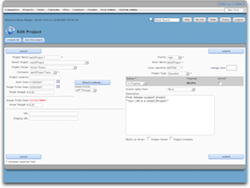
Creating your first Project is a deceptively simple task. Clicking “Project” on the navigation bar and then click “New Project” on the right or by selecting “New Project” from the upper-right dropdown (pictured), you will immediately be taken to the New Project Screen.
- First, you should always give your Project a distinctive name and color. This will help distinguish it throughout the system for both you and your users.
- Next, you must assign it to a Company. For many organizations, all projects will be assigned to the customer’s company for easier permissions management, but your organization may have different requirements.
- Next, every project will have an Owner. By default this will be the person who created the project, but it can be changed to any active user in the system. Being the Owner of a Project does not confer any specific functionality, authority, or even permissions at this time.
- Next, all Projects have a Status. Status is a way of identifying and grouping Projects regardless of their currently assigned Company. Whenever you look at the Project List screen, the Status will determine on which tab the project is displayed. The Status will be used to track a project throughout its lifetime.
- Next, you can choose to Import Tasks. This allows you to create project template which allows for any project to begin with an existing set of tasks which just have to be assigned to the specific dates and participants. Alternatively, templates can be imported repeatedly to create distinct task groups. Within CaseySoftware, the most common template is called a “Phase Template” which encapsulates an entire development phase from Requirements Discovery to Development to Delivery. By importing this repeatedly, multiple development phases can be established and scheduled as necessary.
- The rest of the fields available are purely for display purposes and not related to the current functionality of the system. For example, the Target and Actual Budgets are available for editing but are not updated or tracked anywhere in the system. The two URLs (URL, Staging URL) are references to external websites which might be relevant to a project. They will not normally point to websites or pages internal to your Web2project.
- Finally, your new Project must be saved by clicking “submit”. If for some reason, you have made a mistake in creating your project, you can edit or even delete it from the View Project page if you have the proper permissions.
![]() There are five major features currently implemented concerning Project Templates.
There are five major features currently implemented concerning Project Templates.
First, there are two primary date options: Selecting an Offset Date allows you to specify an arbitrary date in the future for the project to begin and Web2project will sequentially schedule all start and end dates into the future from this point. Selecting an End Date does the exact opposite. After choosing an End Date for your project, Web2project will schedule all tasks from the end of the project backwards into the past resulting in an estimated start date. Next, there are three different import options: “Keep Assignees” will preserve the assignments of all the users within the imported project. No notifications are generated, but if you have laid out the assignments in advance, there is nothing further to do. “Import related files” does exactly what it describes. This comes in useful when you have forms, checklists, etc attached to specific Tasks. These files are automatically copied to the new project without further action. Your files are copied and the originals are not affected in any way. “Import related forums” does exactly what it describes. These forums – but not postings – are copied to the new project without further action. Your forums are copied and the originals are not affected in any way.
![]() At the time of this writing, all budgetary fields are merely for documentation purposes and are not used for tracking, evaluation, or reporting in any way.
At the time of this writing, all budgetary fields are merely for documentation purposes and are not used for tracking, evaluation, or reporting in any way.
View your Projects (Projects Index Page)
When you click on Projects from the menu it takes you to the Projects List Page, also referred to as “The Queue”
The Project Queue contains a number of filters, tabs and options that you can use to help control your workflow.
At the top of the page is a filter to search for projects in the queue. There are also two other dropdown filters that allow you to filter projects by company, department or owner. This is helpful when you have an abundance of projects and you need to narrow your results.
Below the filters are a set of tabs. These tabs are designed to help you control a projects entire lifecycle from beginning to end. You can customize most of these tabs in the System Administration lookup Values.
Each tab contains a table where projects are listed. Each row represents a project, and each column contains useful information about the project at a glance.
- The first column represents the projects unique color identifier and displays the projects overall status.
- The second column (P) represents the priority of the project. You set the priority of the project in the add/edit project page. A blue arrow pointing down represents a project with a low priority. A red arrow facing up is a high priority project. No arrow in the field means the project is a normal priority.
- The third column shows the project name. Hovering your mouse over the project name will display the projects details. Clicking on the project name will take you to the Project View Page. A (+) before the project means the project is a parent project with children under it. Click the icon to expand the view.
- The fourth column tells you what company this project represents. Clicking on the company name will take you to the Company View Page.
- The fifth column is the start date which represents the date the project should start.
- The sixth column is the target end date. When creating a project a target end date is selected, but the actual finish date is set by the designer’s task.
- The seventh column is the actual finish date. This date is dynamic according to task production.
- The eight columns (LP) shows an icon if the designer has marked an issue in a task log.
- The Ninth Column shows who the owner of the project is. The owner is usually the person ultimately responsible for the projects production. Clicking on the owners name will take you to a detailed view about that person.
- The selection checkbox lets you change the status of the project. You’ll mark that checkbox and then select an option from the dropdown menu at the bottom of the table.
- The last column represents the project status. The project status also represents the tabs at the top of the queue.
View a specific Project (Projects View Page)
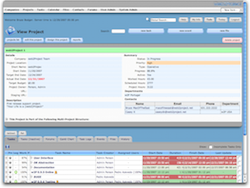
Clicking on the projects name in the projects list takes you to the project view page. This page displays important information about the project and other elements related to it.
The first window contains six (6) main sections.
- Details - highlights the projects name, company, short name, dates, budget, owner and urls for the project. The urls are typically dynamic and support both http:// and network links.
- Description - outlines the projects scope and defines the task to be created.
- Summary - displays useful information about the projects status, priority, type, progress, active state, hours worked and projected.
- Departments - what department the project is assigned to.
- Contacts - list of people associated with the project.
At the bottom of the project view are sub-tabs. These tabs represent other modules that are associated with projects. The amount of tabs that appear here depend on what modules are active via the system administration.
By default the tabs shown here are:
Project Ownership / Company Filtering
One of the most common problems users face after they save their first project is that it seems to disappear. Normally the project still exists and no data was lost, but the user is unable to find it. When looking at the Project List screen, there is a dropdown in the upper left corner called “Company/ Division” (pictured below). This provides filtering to see projects for any individual company at a time. By changing this dropdown to “All”, all projects for any company the user has permissions for will be displayed.


