Files Module
Module Overview
Once your project begins, you will likely want to attach information from individual files. Common additions are contracts, requirements, technical specifications, relevant standards, or any of a plethora of other things. While these can be handled in a third-party Document Management System or a wiki, it is often better to have a single location for pulling all this information together into a single interface for review, comment, update, or perusal.
The File Repository in web2Project is a well organized dynamic module for maintaining your assets that are associated with Projects, Task, or the Calendar. The files module appears in the main navigation by default, but you can also access files via projects, project designer, and task.
In the web2Project file repository you can:
- Create your own folders for any purpose.
- Associate files to those folders
- Add multiple file formats
- View files under relative Projects and task
- Checkout/checkin files
- Track Revision Cycles of files.
- View file size, type and date added.
Attach a File
The three ways of getting to this module are all effectively the same. The fastest is to select “New File” from the “New Item” dropdown in the upper right corner of any screen. Alternatively, you can select the File module from the main navigation and then click on the “New File” button. Finally, you can select a particular project or task, click on the Files tab, and then click on “Attach a file”.
You can then select a Category of the File – default options are “Document” and “Application” – assign a specific Project/Task, and fill in a description. The primary benefit of attaching the file through an individual Project or Task is that this information will automatically be filled in on this screen. Regardless, if you attach a file and associate it with a Project or Task, the owner will immediately be notified of the new file available.
Check-in / Check-out / Update
As most projects progress, new versions of documents become available, documents change, and old information becomes less relevant. In order to handle this, Web2project has a simple versioning feature with checkin/checkout functionality. A user simply clicks on the “co” column to checkout the file. They fill in a comment and download it immediately. When their modifications are complete, they click on the “co” column again, fill in a new comment, denote whether this is a major or minor revision, and save.
The previous version of the file is kept untouched and the new file is displayed. Older versions of every file are kept for archival purposes and are denoted in the version column with a number in parentheses. By clicking on this number, all previous versions of the file are displayed and available for download. This protects files from being lost either due to malicious or accidental actions.
View Files List Page (Files Index)
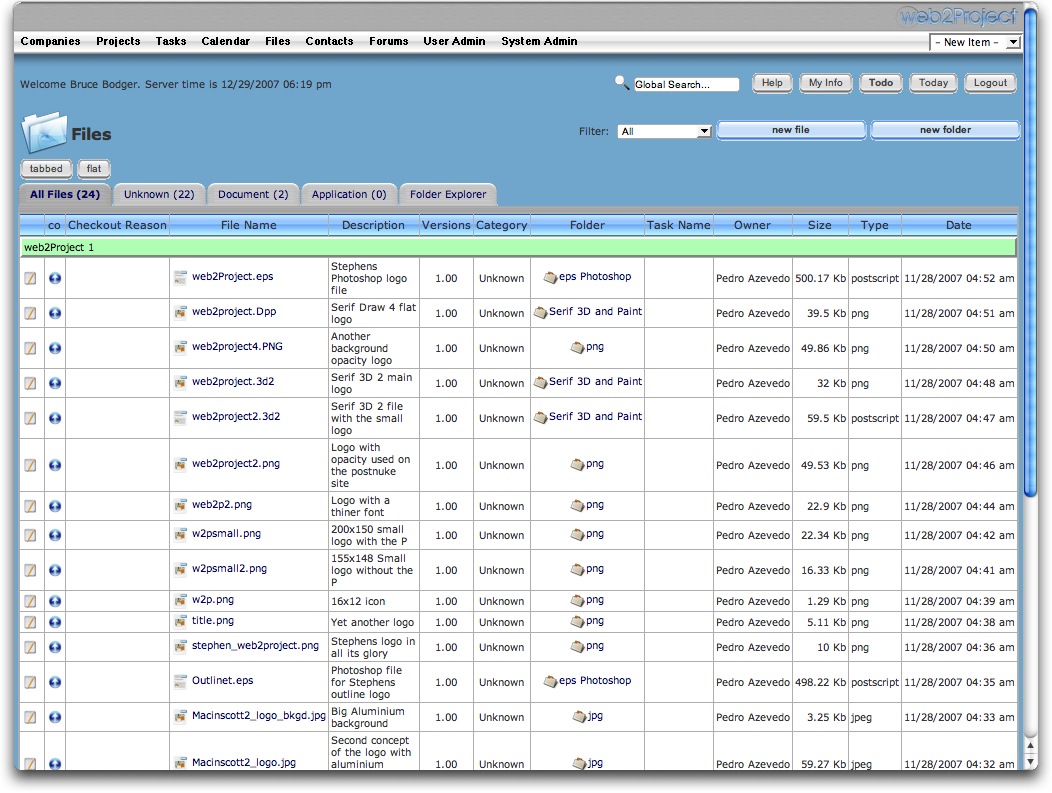
When you click on the “Files” link from the main navigation menu you will see the Files List by default.
The files list page contains a number of tabs that are designed to help you better associate your files within a category. You can define these tabs to meet your own needs from within the System Administration Lookup Values.
On the upper right hand side of the page are two buttons. The first button is used to add a new file to the repository, and the second button is used to add a new folder. Next to those buttons is a filter that you can use often to filter the view of your files.
The default view of the files repository contains a table that lists the files currently in the system along with some additional information.
- The first column allows you to edit the files information
- The second column allows you to checkout/checkin the file
- The third column will show you the checkout reason when a file is checked out.
- The fouth column shows the files name
- The Fith Column shows a short description
- The sixth Column shows the version number. When you checkout and file and then check it back in, web2Project will also track the file version number. When you click the file name, you will download the latest version of the file.
- The seventh column will show you what category the file belongs. The category is defined by tabs.
- The eight column will show you what folder the file belongs under
- The ninth shows who uploaded the file
- The tenth shows the overall file size
- The eleventh shows the file type
- And the last column shows the date and time the file was added.
Files Add/Edit (Files addedit)
To add a file to the file repository do one of the following:
- To add a file via the main repository click on “Files” in the main menu, then click the “New File” button located in the upper right corner.
- To add a file via a project click on the Files sub tab from within the project view page. If folders exist, click on the last icon on the far right side
Note: If you hover your mouse over the icons a tool tip will appear telling you what function that icon serves.
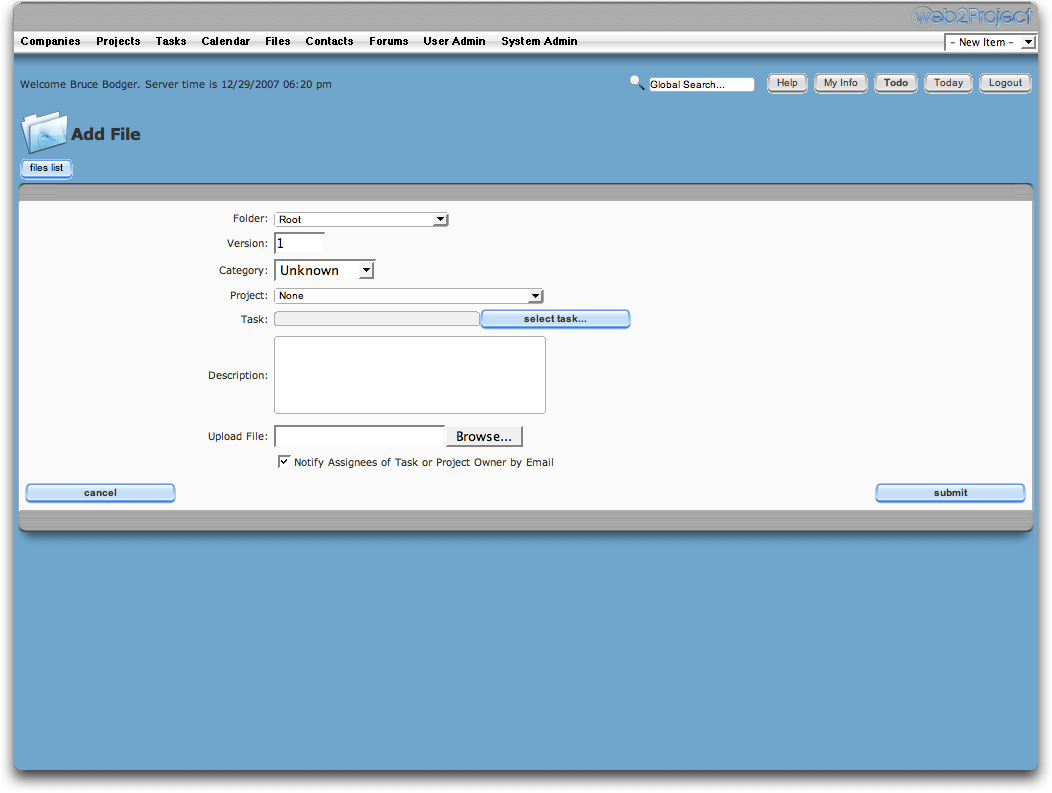
The add file page contacts a number of form elements that you can use to manage your files.
- The folder drop down allows you to assign this file to a folder.
- The Version text box allows you to assign a version number. By default when you are adding a file to the system it is assigned version number 1 unless you change it.
- The category dropdown list the tabs in the files list page.
- The project Dropdown lets you assign this file to a project. In most cases it might be easier to add a file to a project via the projects file tab.
- When you assign the file to a project you can also assign the file to a specific task.
- The description tab lets you add notes about the file.
- Upload file box lets you browse and upload your file from your local computer or network.
- The checkbox allows you to notify Assignees or task or project by email.
Files Folder Explorer (Folder Explorer)
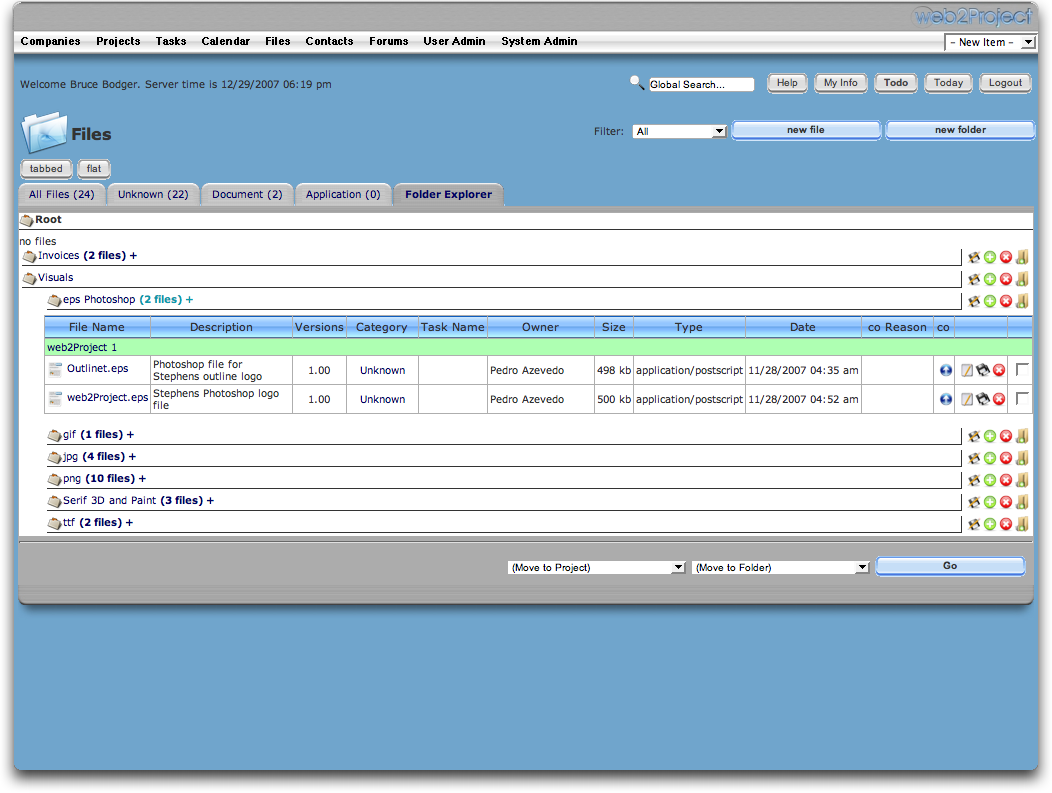
The folder explorer in web2Project allows you to view files that are specific to that folder. You can also perform a number of functions within this view that you can do in the main file list.
To access the folder explorer simply click on the folder name in the File list page.
The icons on the upper left allow you to:
- Return to the file list
- Go to the parent folder if a parent folder exists
- Edit the folder
The icons on the far right allow you to:
- Checkout/Check-in
- Edit
- Duplicate
- Delete
Files Folder Add/Edit (Folder Addedit)
To create a new folder in the main file module click the “New Folder” button in the upper right.
To create a new folder from the project view page click the files sub-tab, then click on the green plus icon in the table.
Note: To delete a folder click on the red X icon, to edit the folder click on the disk icon.
The add folder page allows you to:
- Assign this folder to the root directory or as a sub-folder (child) to another folder.
- Give the folder a name
- Type a short description.