
Calendar Module
Module Overview
One of the most useful things of any collaboration system is a single shared Calendar for all users. This is useful for coordinating schedules, reviewing priorities, and even determining individual availability. Web2project offers this basic functionality and quite a bit more combining the Events, Tasks, and offering a variety of filtered display options.
The Calendar module provides the users with interfaces to manage the Tasks and Events in a chronological way. Further, this module gives you the ability to view and filter Events by Company and by who created or was invited to them, in addition to displaying by Day, Week, Month, and Year.
Basic Display
The base view of the Calendar Module is a simple month view similar to Outlook or Google Calendar. It always defaults to the current month displaying all of the Users’ Tasks and Events. This view is filtered according to two aspects: Company and Ownership. At any time, a User can change the Company filter from any one to all of them. This gives a quick review on a per-customer basis with no additional effort. The Event Filter allows a User to change their view based on All Events for selected Company, Events I Created, and My Events for selected Company. By changing the combination of these two aspects, Users can look at the information from a variety of angles and determine a great deal about most projects.
The links at the top of each calendar page switch between the year, month, week and day views.
 Every user has a private Calendar Feed link on their page in User Admin (open My Info from the user menu to find yours). Calendar applications such as Google Calendar, Apple Calendar or Outlook can subscribe to it to show your Web2project events and tasks. If the link is shared by mistake, select “regenerate feed url” to replace it.
From the Month View, a user can click on the button on the far left of any line. This will take the User to a Week View based on the selected Company. It breaks down the week into a simple layout similar to a weekly planner. The Company and Event filters are available here too.
Creating an Event / Recurring Events
Creating an Event in Web2project can be done at anytime from anywhere in the system by selecting “New Event” from the New Item menu at the top of the page, or with the “New event” button on any calendar view. You simply name the event, give a brief description, select the relevant project, invite people, and set the recurrence schedule. Invited people see the event on their calendars, and if you tick Mail Attendees they receive an e-mail about it.
Events attached to a project appear on that project’s Events tab, and a company’s events on the company’s Events tab.

With this form you will be able to create or edit Events. You can invite other users to those events and make sure they get notified by email about those Events.
Events can be associated with projects, meetings, or anything else relative to your daily workflow.
How-to use this page:
- Enter a Name for the event.
- Choose its Type.
- Note: The types can be changed under System Admin → System Lookup Values (EventType) to meet your needs
- Choose the Event Owner.
- Associate this event with a Project.
- Tick Private Entry to hide it from other users.
- Set the Start Date and End Date, with their times.
- Note: These determine where it appears on the calendar views, including the day view’s timeline
- Choose how often it Recurs and how many times, and whether it falls Only on Working Days.
- Invite People: select names and use the arrow buttons to move them to Invited to Event.
- Type a Description.
- Fill in any custom fields set up for the Calendar.
- Tick Mail Attendees to send the invited people an e-mail about the event.
Viewing all Events
View a Specific Day’s Events (Day View Page)

On this interface the user will be able to see what is going on, on a given date as well as the Tasks and Events set for that date considering the available filters. You will find two tabs, one with the Tasks to be done on that date and another with the Events set for that date.
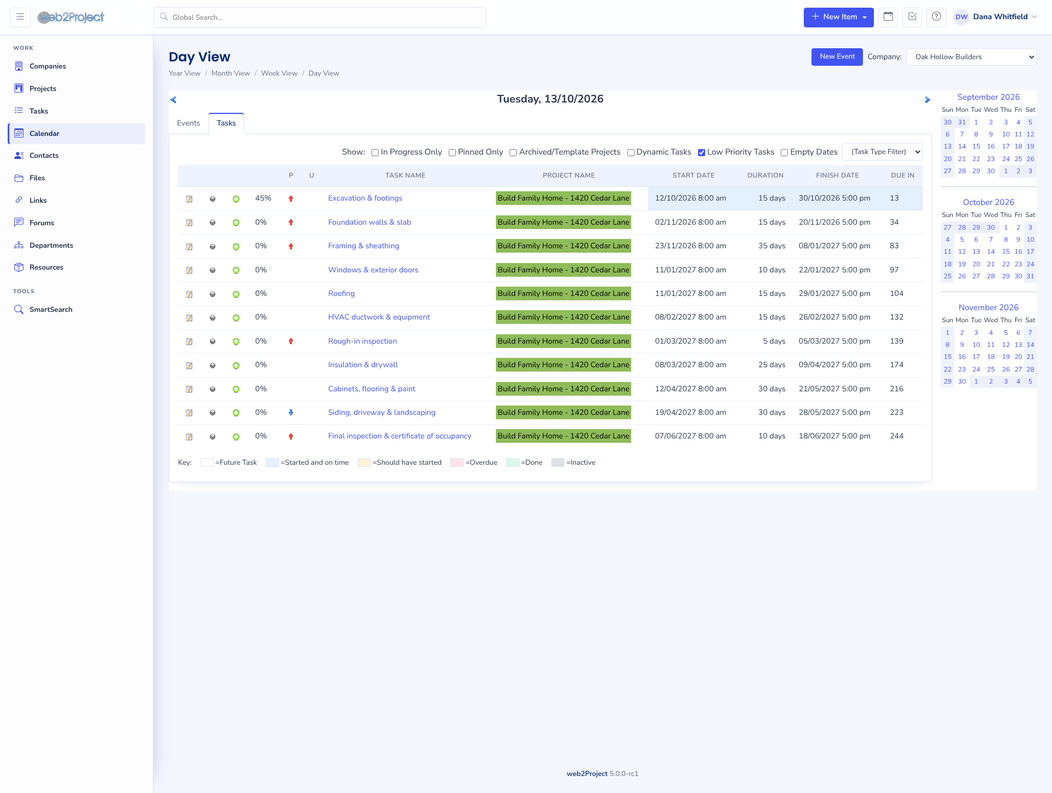
The day view is probably one of the most detailed views in the calendar. By default it will list events you have scheduled for that day in 15 minute time intervals.
From this page you can:
- View all your events for the day
- Switch between the Events and Tasks tabs
- Schedule a new event with the “New event” button
- Set a company filter
- Move forward and backwards in time for the day, week or month
Clicking on a day within any of the calendars on the right hand side will take you to the day view for that month.
View a Week (Week View Page)

The Week View page gives a week perspective of the Tasks and Events set for a given Week.
One area identified by some companies as a standard best practice is to view your task and events that are active for the week. In addition, if you are a designer and you wish to collaborate with another designer on a project in the system, you can use this view to see what their schedule looks like before including them as a resource.
From this page you can:
- Switch to the year, month or day view
- Click on a day and switch to day view
- View the weekly calendar for a company
- Change the Event Filter
- All Events for selected Company
- My Events for selected Company (this includes events you were invited to but didn’t create)
- Events I Created
- You can also move forward and backwards in weeks.
View a Month (Month View Page)

The Monthly view shows the user which Tasks and/or Events are scheduled for each day in the Month.
Generally when you create an event or task in the system, this will create links within the calendar dynamically showing you the start and finish dates within that month. Each link in the calendar is dynamic, so you can click on it and it will take you to the details of that object. This is particularly useful when you want a snap shot view of what’s on the agenda for the entire month.
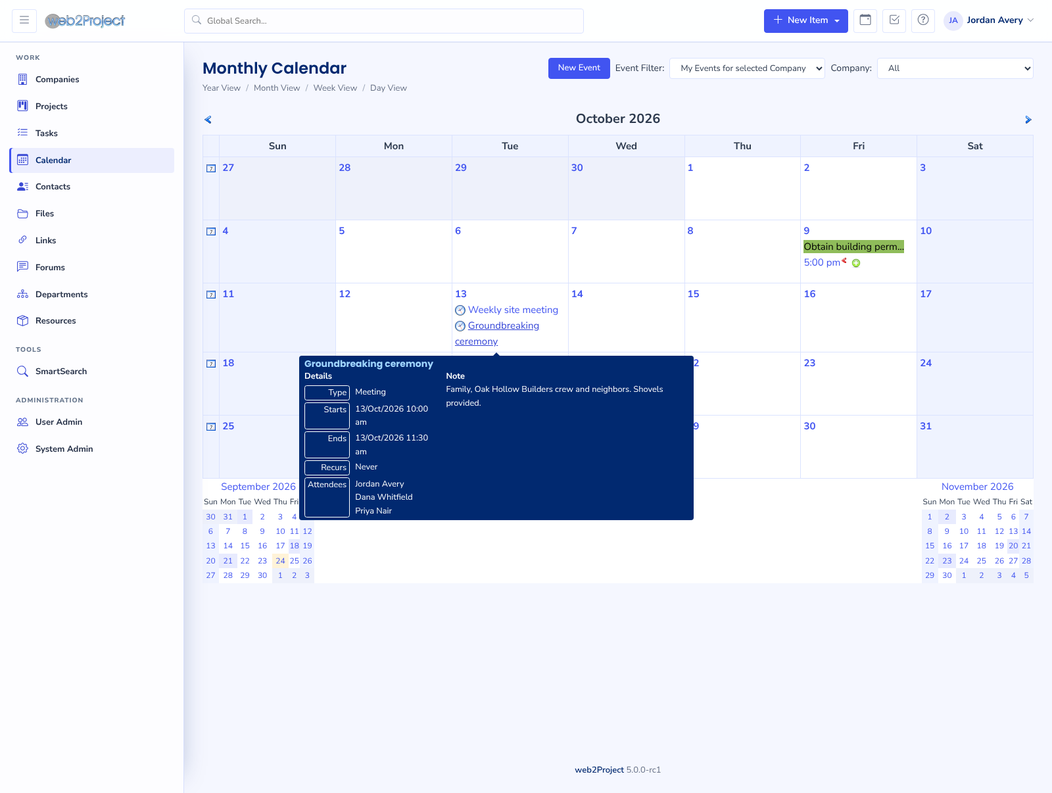
Depending on how the administrator has the system configured, you can use filters to view calendar details for other Departments or Users, in addition to your own.
From this page you can:
- Click on a task or event and view details
- Change to Week View by clicking on the box icon on the left
- Go forward and backwards in month views
- Switch to year view with the “year view” link
- Set company filters
- Set Event Filters.
There are effectively two ways to move forward and backwards in time.
- Click the arrow icons at the top of the calendar (Located on the right and left site top)
- On the bottom of the page you’ll see the previous and next month quick links.
View a Year (Year View Page)

The Yearly view gives the user an overall view of the Year calendar and color codes the days depending on the existence of Tasks and/or Events.
It’s not uncommon to have events or task that last more than a calendar month. In addition you may want to be able to recall what your schedule looked like for the year. The year view gives you the option to view your entire schedule for the year.
From the Year View you can:
- Move forward and backwards in time to next or previous year
- Click on any given month to switch to that month
- Set Company Filters
- Set Event Filters
- Switch to week view by clicking on the week icon in each month displayed.