User Administration Module
Module Overview
Now that you have a Company and a Project in your system, it is time to create your a User. Remember that more than anything Web2project is a collaborative tool and the goal of it is to share information. However, it is quite common that you will need to keep certain aspects private to protect the confidential or proprietary information of your customers. Therefore, the creation of Users and setting their permissions become some of the most important aspects of its day to day usage. Unfortunately, it can also be quite difficult to understand at first glance. The basics of Permissions are covered here, but for a more rigorous discussion, please review “Permissions 201” in the System Administration section.
From the user admin module you can:
- Add, Edit, Delete users
- View important information about the user
- Change permissions to the user
- Activate or deactivate a user account
- Search for users
- View a user’s access logs
We recommended that you disallow access to this module to basic users in the permissions or roles administration.
Create a User
Creating your first User can be a confusing experience if you do not understand the process in the beginning. First click “User Admin” in the main navigation and then “add user”.
From here, all the standard user fields are available including username, password, and email address. You must also assign the User to a specific Company. This does not determine any permissions, but it does begin to build the associations. Once you save this information, the User account will be created along with the corresponding Contact record. The user now has an account with no Roles or permissions and can therefore do nothing, not even log into Web2project.
![]() The Web2project permissions system assigns zero privileges by default.
The Web2project permissions system assigns zero privileges by default.
Before a new User can log in, they must be assigned a Role in the User Administration Module.
Assign Roles
To let the User log in for the first time, he must be assigned a Role. The four roles at installation are Administrator, Project Worker, Guest, and Anonymous and grant progressively more and more restrictive permissions.
- Administrator – An Administrator can do anything they choose within the system. This includes creating, editing or deleting any information along with assigning Tasks, changing Users’ passwords, or even creating other Administrators.
- Project Worker – A Project Worker can create, edit, or delete any non-administrative information throughout the system. They can create Companies or Projects, assign Tasks, and log time against any task in the system. Most users will be a variation of this role.
- Guest – A Guest can view any non-administrative information. They cannot create, edit, or delete anything and therefore this works well as a basis for a Customer Role.
- Anonymous – An Anonymous can see the navigation and nothing else. While this role may seem silly at first glance, it can serve as a reasonable basis for highly limited Users who should only view specific Tasks. By assigning this role as a start, no existing information in the system is made available whatsoever.
Add / Deny Permissions
There are five attributes which can be connected with any Module to expand or limit these basic Roles as needed. The attributes are Access, Add, Delete, Edit, and View and can be assigned to the Module as a whole or to specific aspects of the Module. For example, a Resource Manager type user might have a Project Worker role supplemented with Allow permissions to Access, Add, View in the User Admin. This would give him access to create new users as necessary without the ability to delete users. To further safeguard against abuse of this account, the System Administrator could add Deny permissions to anything done by the Resource Manager user to the System Administrator account.
For more details and examples of permissions, please read Permissions 201 below.
Active Users
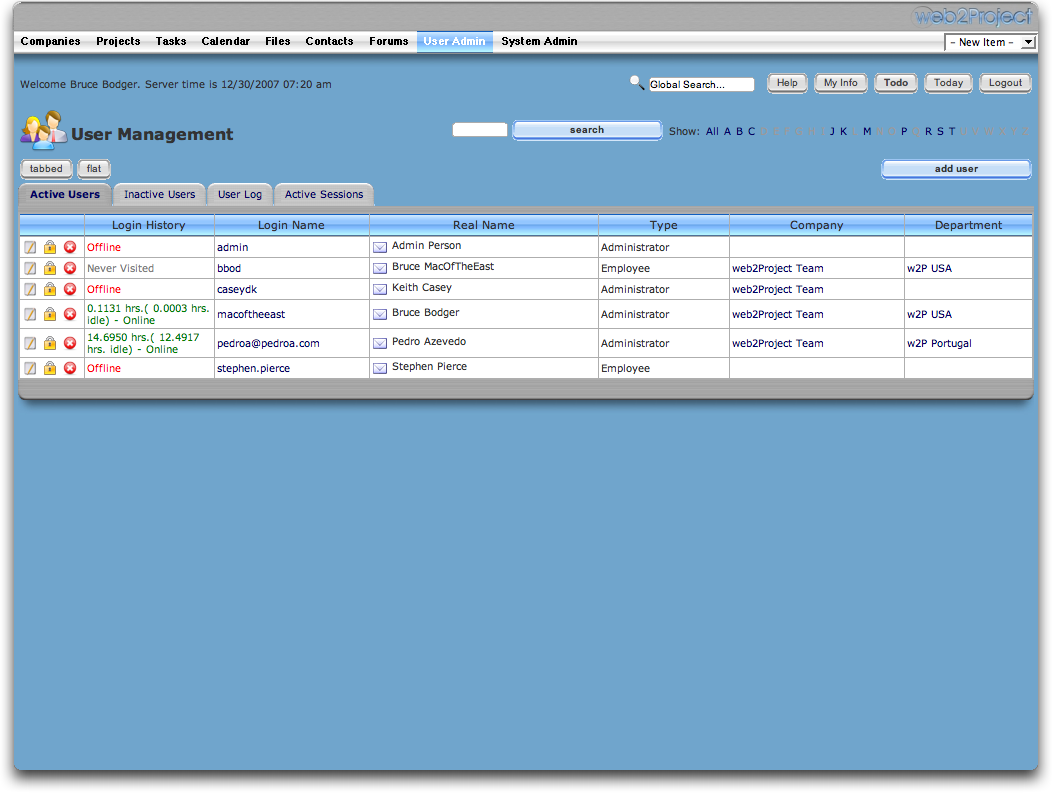
The active users page displays a number of filters you can use to search or display information
- Enter users first, last, or user name in the search field.
- Click on a letter in the alphabet to search for a user’s name
The table in the center of the stage contains a number of columns.
User Information
| Field | Description |
|---|---|
| Icons | Edit-Permissions-Delete |
| Login History | Displays the history |
| Login Name | User Name |
| Real Name | Actual Name with email icon |
| Type | Type specified in add page |
| Company | Company for user |
| Department | User department |
Inactive Users
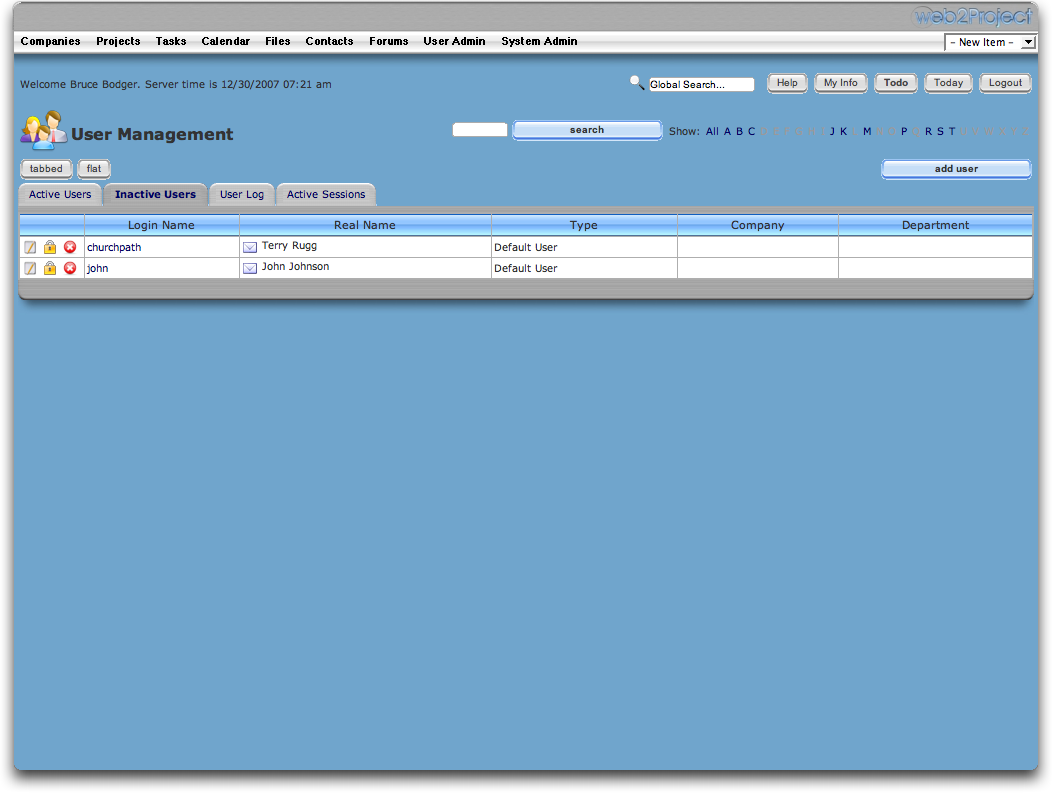
Inactive users are usually users who do not have a user role or permissions assigned to them
By default, when a user first registers in the system they are set to an inactive state. An email is sent to the system administrator and they must assign a role to the user before the user can be active.
See Permissions for more information
Add/Edit User Preferences

You can change the user preferences just as you can change the default user preferences for unregistered users.
Changing the user specific preferences will override the default user’s preferences.
To change the preferences for the user click on the yellow lock icon in the far left column. By default this will take you to the permission page. At the top of the window is a button to edit the user preferences.
For more information see Default User Preferences in the System Administration Module.
Add/Edit User

To Add a New User
To add a new user from within the user administration click on the “new user” button.
The Add user page contains a short form for creating a new user. After filling our the form fields you can mark the “Inform new user of their account details” to notify that user they are registered.
Keep in mind that users can register themselves by clicking on the “I want to register for a new account” link on the main login page.
After you create the user, you must remember to give that user a role or they will not be able to login.
To Edit an Existing User
To edit a user click on the notepad icon in the table on the stage.
You will notice this page has less form fields than the add user page.
Here you can change:
- The user type
- Name
- Company
- Department
- Email Signature
Do to security issues you can not change the password. If the user can’t remember his or her password it is best to have them click on the “help I have forgotten my password” link in the main login.
View User
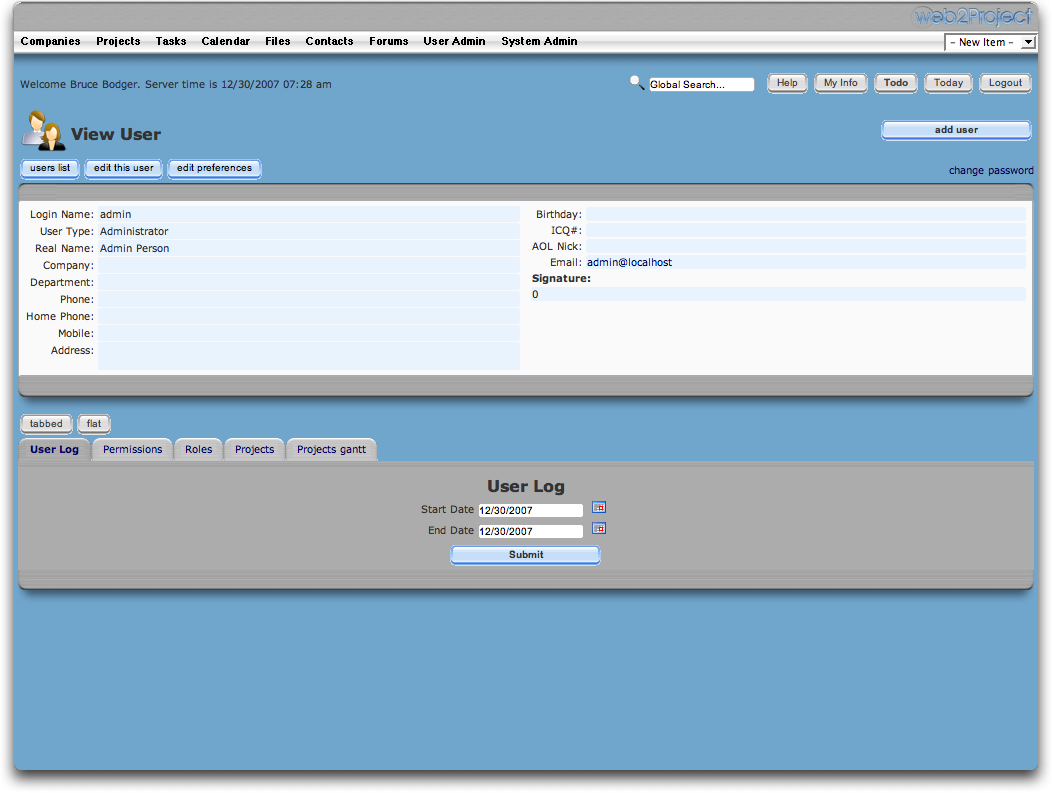
Click the users login name from the user administration to access the View User page.
The view user page contains a table showing the users details. From this page you can:
- Go back to the user list
- Edit this user
- Edit this users preferences
- View the user’s log
- View the user’s permissions
- View the users Role
- View the users Projects & Gantt
User Log
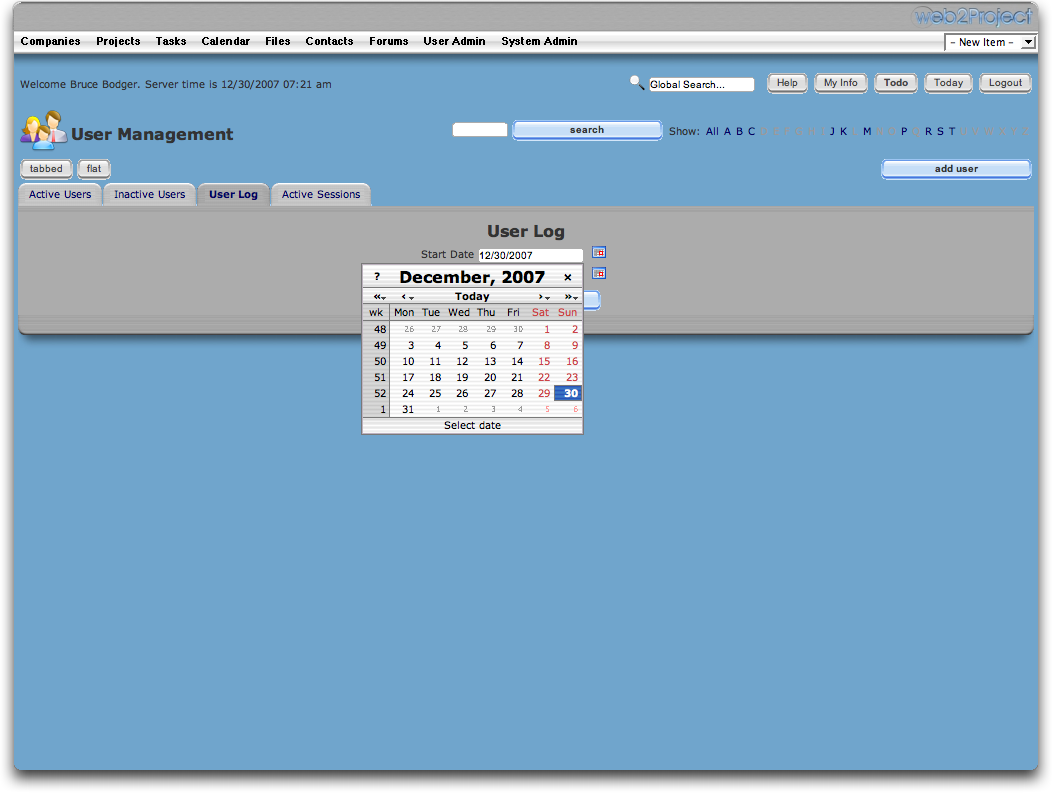
The user log by default contains two calendars you can set to view the users login history. After setting the dates a table will display highlighting that users activity.
| First Name | Last Name | IP Address | Date & Time IN | Date & Time OUT |
|---|---|---|---|---|
Sessions

Active Sessions is the last tab located in the user list page. Here you can end a user session or force the user to logout.
This helps when you have multiple users logged in at once and need to free system resources, or for security issues.