System Admin Module
Module Overview
The System Administration in web2Project is where you control many aspects of the systems core functionality and general maintenance.
System Admin List (index)
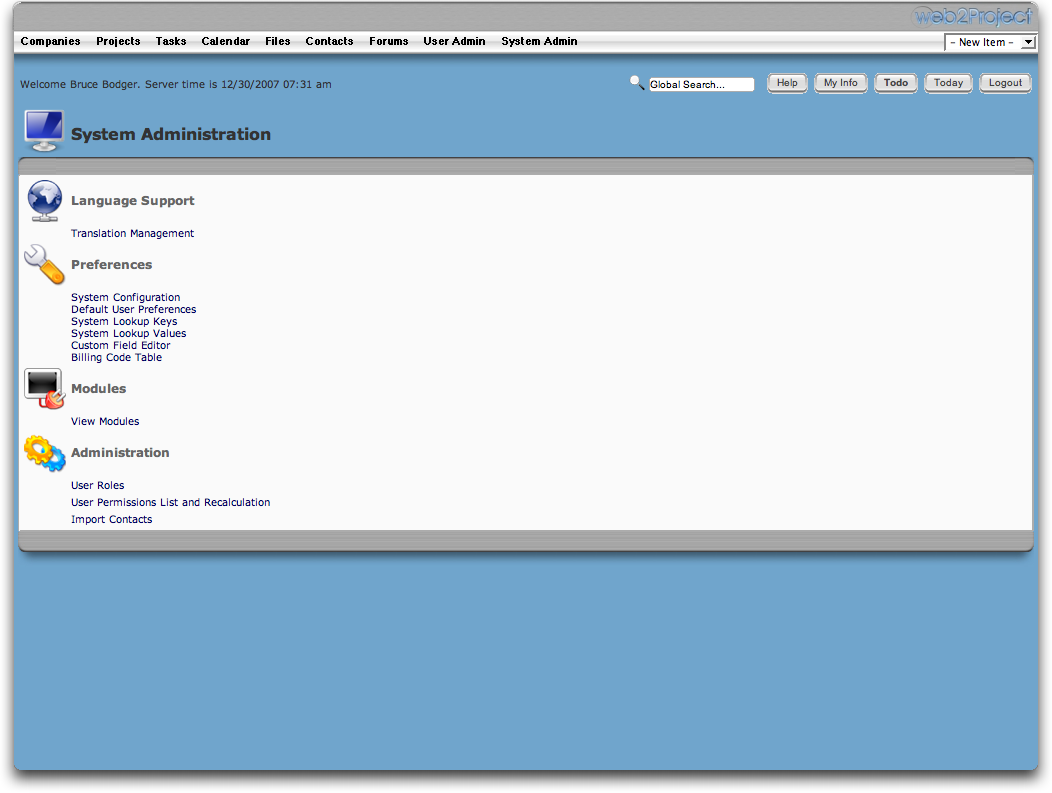
The System Administrations main page consists of four (4) main categories highlighted in bold:
Language Management
- Translation Management
Preferences
- System Configuration
- Default User Preferences
- System Lookup Keys
- System Lookup Values
- Custom Field Editor
- Billing Code Table
Modules
- View Modules
Administration
- User Roles
- Users Permissions Information
- Import Contacts
System Admin Translation Management (translate)
![]()
You can change the default language of web2Project with the Translation Management table to meet your own individual or company’s needs.
In order to install a translation you need to have administrative privileges and access to the server’s web2Project directory.
Additional language packs are mostly a user supported contribution. When available you can download language packages to save yourself some time or when not available you can create your own.
System Admin System Configuration - the engine under the hood.
System Admin System Configuration 1 (systemconfig 1)

Access the system configuration via the system administration menu item. For additional help as you configure the system simply hover your mouse over the (i) icon in web2Project to view a tool tip for that option.
- Host Locale - This option indicates the localisation or language setting for your site.
- Overallocation Checking - This is a work in progress WHICH SHOULD NOT BE USED It is the basis of a system that will allow Project Managers to establish the maximum % of time that a resource can be allocated to a particular task for a particular period of time.
- Currency Symbol - Localisation of the currency-symbol.
- Default User Interface Style - As set in the User Preferences area, however, you will need to type the name of the default in here. If you need a prompt - check the dropdown in the User preferences and repeat that name here.
- Company Name - The company name setting is used to stipulate what will appear in the top name of the login box on your site.
- Page Title - Stipulate what will appear on the top line of the browser - before the browser name.
- Site Domain - The domain set here is used to generate an email address if an incomplete address has been entered in the user’s record.
- Email Prefix - This setting is used to stipulate the subject line prefix for all email that web2Project sends out.
- Admin Username / admin_user_title - This setting is used to nominate which of your web2Project user accounts is the administration account.
- Minimum Username Length - Establish the minimum length of any user names for web2Project. This can NOT be longer than the length of the column in DB
- Minimum Password Length - Establish the minimum length of any password entry in web2Project. This can NOT be longer than the length of the column in DB
- Enable Gantt Charts - The option to enable or disable Gantt charts allows you to turn on the function or turn off the function, depending upon whether you wish to use Gantt charts on your site.
- jpGraph Locale - Use this option to set a locale for jpGraph if it is required. jpGraph is the third party package that is used throughout web2Project to create graphics or charts (eg the Gantt chart). Leave blank if you experience problems.
- Log Changes - This option allows you to nominate whether you wish to Log Changes in the history module automatically.
- Check Task Dates - If this option is turned on the start and end dates will be required in all tasks before they can be added.
- Translation Warning - Display a warning in the User Interface when a translated item is not found. (Used in conjunction with Translation Alert String)
- Translation Alert String - The string appended to untranslated strings or unfound keys if Translation Warning is turned on.
- Daily Working Hours - This setting establishes the standard number of hours in a working day for your installation, for example 8.0
- Show Debug Messages - Set to true to display debug messages as well as log them. WARNING: Setting to true can cause web2Project to fail on warnings if the debug level is set greater than 1. Normally errors will be displayed so this should only be set to track warnings and debug messages if you do not have access to the PHP log files.
- Allow Ticket Relinking - Having this option turned on will allow you to relink tickets to an arbitrary parent in Ticketsmith. Could be useful for email-generated tickets
System Admin System Configuration 2 (systemconfig 2)
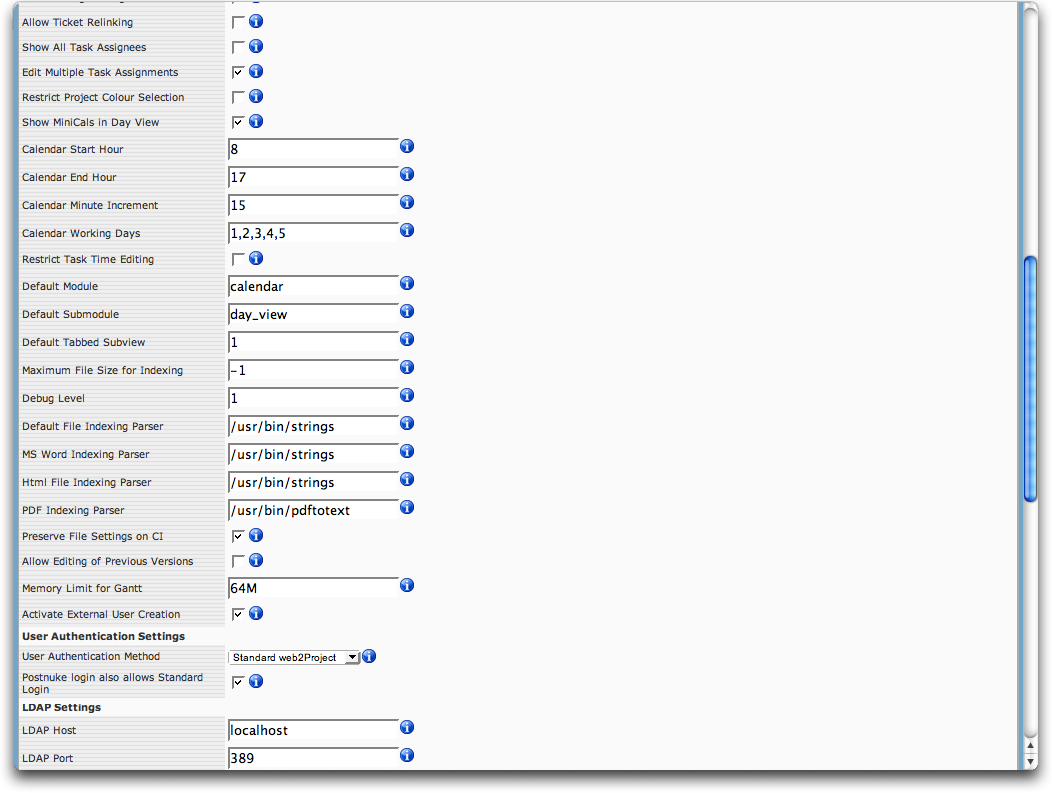
- Show All Task Assignees - Set this option on if you wish to show all assignee names in the project task task list or off if you would prefer to see just the main assignee name and a count in brackets of the number of other assignees.
- Edit Multiple Task Assignments - Turning this option on will allow you to edit task assignments and other options (per task block) in the main Task Module view.
- Restrict Project Colour Selection - Used in conjuction with the System Value Look up option “ProjectColors” you can use this setting to control the project colour selection options accessible by all users on this system. If you turn this option on then project creators will only be able to select from the colour options defined in the System Value Lookup outlined above. If you turn this option off then project creators will be able to access the default system presets and the full colour pallette.
- Calendar Start Hour - Use this option to indicate the starting hour for your calendar day - integer value from 0 to 23
- Calendar End Hour - The last hour of the working day - integer value from 0 to 23
- Calendar Minute Increment - Minute increment setting for the Calendar Time Display
- Calendar Working Days - Establish the required working days for your company in a comma separated list where 0 is Sunday. For example if you work Monday through to Friday your list would be 1,2,3,4,5. If you work Friday through to Sunday your list would be 5,6,0
- Memory Limit for Gantt - Experiencing Errors with invisible / errors on Gantt Charts use this variable to temporarily expand your PHP Memory Limit for Gantt Chart drawing. Values of 64M, 128M etc. are common.
- Restrict Task Time Editing - Turned on, this option will restrict the editing of task time settings to the task owner, the project owner or the system administration only.
- Default Module - If you want to define your own start/default page set this. If the value is empty then the first listed module becomes the default view.
- Default Submodule - If you want to define your own start/default page set this. Specifies a subview like shown in the url of dP.
- Default Tabbed Subview - If you want to define your own start/default page set this. Specifies a tabbed subview. 0=first tab, …
- Maximum File Size for Indexing - File Indexing for Searching: Large Files may cause timeout problems during exhausting indexing process. Specify an upper filesize limit for indexing in KiloBytes. Have in mind that files greater than the specified value are not indexed! A negative value defines the absence of a limit (index all files).
- Debug Level - Turn this option on to display debug messages as well as log them. WARNING: Setting to true, if the debug level is greater than 1, can cause web2Project to fail on messages that are technically only Warnings and therefore can be ignored. Normally errors will be displayed so this should only be set to track warnings and debug messages if you do not have access to the PHP log files. Anything other than 0 will provide debugging information. Level 1 is probably the most reasonable compromise between normal operation and error tracking information. Set to 10 to get complete debugging information but be aware that this will generate large log files and/or debug listings very very quickly.
- Default File Indexing Parser - Location for the Default File Indexing Parser, e.g. /usr/bin/strings
- MS Word Indexing Parser - Location for the MS Word File Indexing Parser.
- Html File Indexing Parser - Location for the Html File Indexing Parser, e.g. /usr/bin/strings
- PDF Indexing Parser - Location for the PDF File Indexing Parser, e.g. /usr/bin/pdftotext
- Preserve File Settings on CI - Keep file attributes during Check In. If this is on, you will not be able to change file type, project or task of a file during the check in.
- Allow Editing of Previous Versions - Allow or disallow editing of previous versions of files in File Module
- Show MiniCals in Day View - Include MiniCalendar Displays in the Day View.
- Postnuke login also allows Standard Login - If PostNuke authentication is in effect, setting this also allows standard web2Project logins. If not set all logins must be performed via PostNuke.
- tasks_ajax_list_title - Turn on / off ajax support on Task listings.
- stf’n_title - tba
- User Authentication Settings - Methods for authenticating (checking for valid) user login name / password combinations.
- User Authentication Method - This option will list the authentication methods available (this will depend on the modules installed / options configured on your site). For more Details see User Authentication Methods
- LDAP Settings - These options set up LDAP server access for web2Project to connect to.
- LDAP Search User - The full DN of a user who has access to search your users directory
- LDAP Host - The Name or IP address of the LDAP host to authenticate against, when using LDAP Authentication.
- LDAP Port - Port Number to use to connect to LDAP authentication host.
System Admin System Configuration 3 (systemconfig 3)
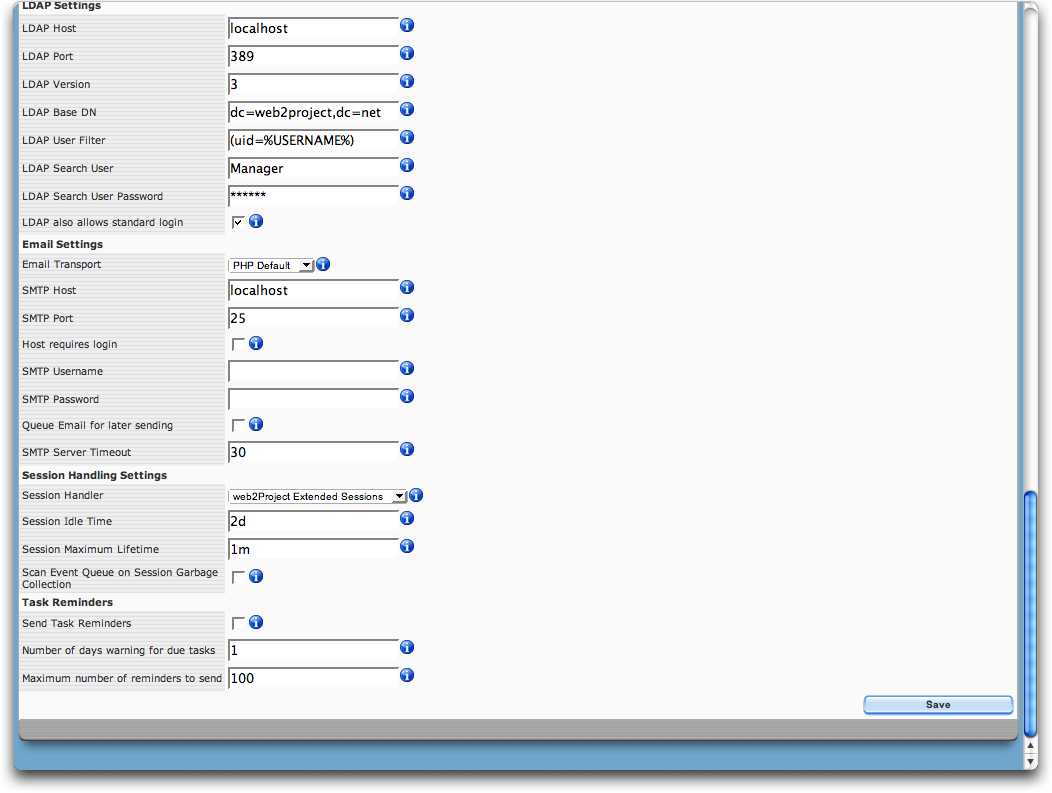
- LDAP Version - LDAP Version that the LDAP host understands. If unsure, leave at the default of 3.
- LDAP Base DN - The Base Distinguished Name (DN) to use for LDAP queries.
- LDAP User Filter - User Filter to use for determining matching users on LDAP queries. Check with your site administrator for details.
- LDAP Search User Password - Password for the search user from your LDAP server
- LDAP also allows standard login - Tick on to allow web2Project database only based users to login
- Email Settings - This option is used to tell web2Project what it needs to know to connect to your email setup.
- Email Transport - Select either PHP for standard PHP mail support or SMTP for direct SMTP support
- SMTP Host - The fully qualified domain name (FQDN) or the IP address of the SMTP host to use for sending email
- SMTP Port - The TCP port to connect to the SMTP host. If in doubt, leave it at the default of 25.
- Host requires login - Some SMTP hosts require authentication, if yours does you will need to set this and provide a username and password. Tick to turn on and then use the next two settings (SMTP Username and Password) set up the required elements.
- SMTP Username - The username to use when authenticating to your SMTP server
- SMTP Password - The password to use when authenticating to the SMTP server
- Queue Email for later sending - Check this to queue email for later sending. An entry will be made in the Event Queue. You will need to either set the Scan Event Queue option in Session Handling or create a cron job to call: wget -O- http://your.domain/web2Project/queuescanner.php
- SMTP Server Timeout - The number of seconds to wait for a successful connection to the SMTP server
- Session Handling Settings - User Sessions or login sessions are required to maintain ongoing connections with web2Project (if users are being logged out between pages, for example, then it could be that you don’t have user sessions set up properly).
- Session Handler - Which session handling to use, should be either ‘php’ for traditional PHP session management, or ‘app’ for the web2Project application to manage its own sessions via the database. Session Management: This extends the session handling of PHP to beyond browser-based sessions and stores the session information in the database. This allows for prolonged sessions with lower overheads.
- Session Idle Time - The maximum time a session can have no activity before it is declared dead. Values are in seconds unless followed by a letter: h = hours, d = days, m = months, y = years. You can only have 1 character within a string, so 2d4h is NOT valid, but 28h is.
- Session Maximum Lifetime - The maximum time a session can exist before it is trashed, regardless of how active it is.
- Scan Event Queue on Session Garbage Collection - If using deferred email or any other event queue, setting this causes the session handler to check the queue when it garbage collects the session. This is an option to using an external program to call the queue scanner.
- session_name_title - Name / ID of sessions for ease of identification - we’d suggest you use web2Project
- Task Reminders - These options setup how / when task reminders are emailed.
- Send Task Reminders - Tick on to send out task reminders - if off then no reminders will be sent to anyone. If set, an email will be sent to all assignees when a task is due and every day it is overdue until completed.
- Number of days warning for due tasks - Setting this will determine how many days before a task is due the first reminder is set.
- Maximum number of reminders to send - If a task is overdue for a large number of days, it may not be worth sending any more reminders. This value determines the total number of reminders that will be sent, including pre-due date warnings and overdue alerts.
System Admin Default User Preferences (addeditpref)
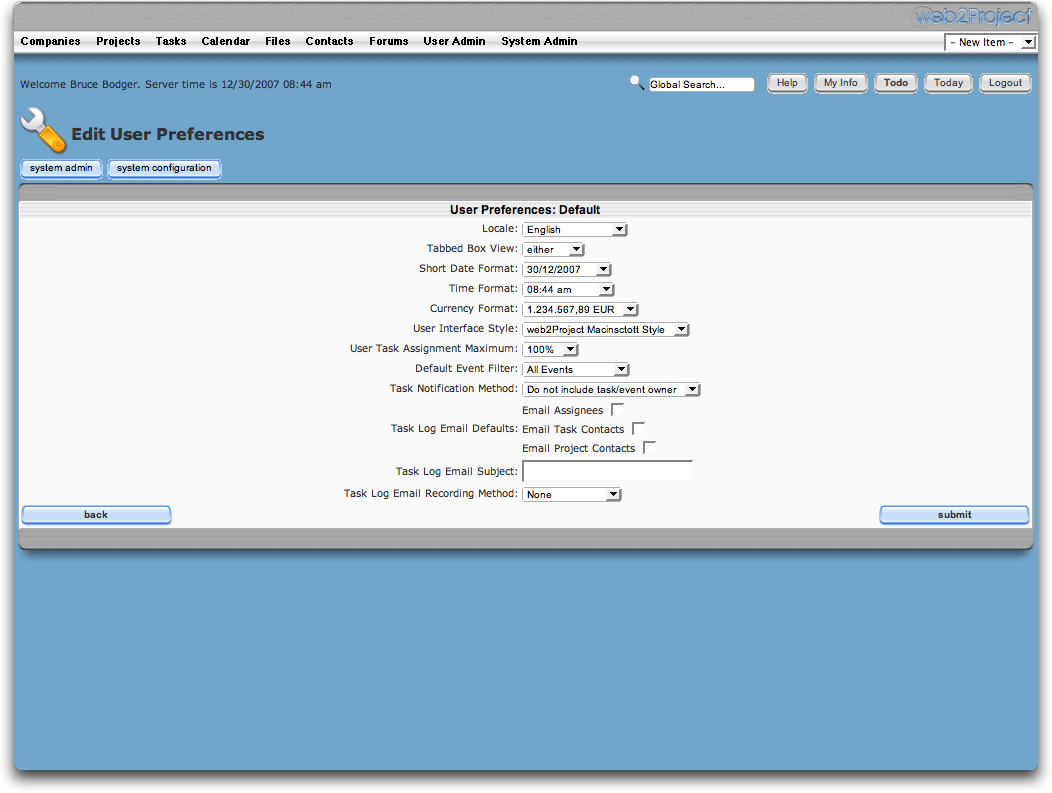
Setting the default user preferences dictates what people see and can do by default when creating a new account. It is the same is setting the individual user preferences after a user has an account.
By default when a new user registers for an account, they will adobt the default user preferences you specify here, however, you can change preferences for each user under the user administration preferences
From this page you can:
- Specify the default locale
- Specify between tab or box view (See projects list tab view button)
- Date Format
- Time Format
- Currency
- Theme style
- Task Assignment Max
- Task Notification
- Email Defaults (If checked checkboxes will be checked by default for users
- Subject
- Recording methods
System Admin System Lookup Keys (keys)
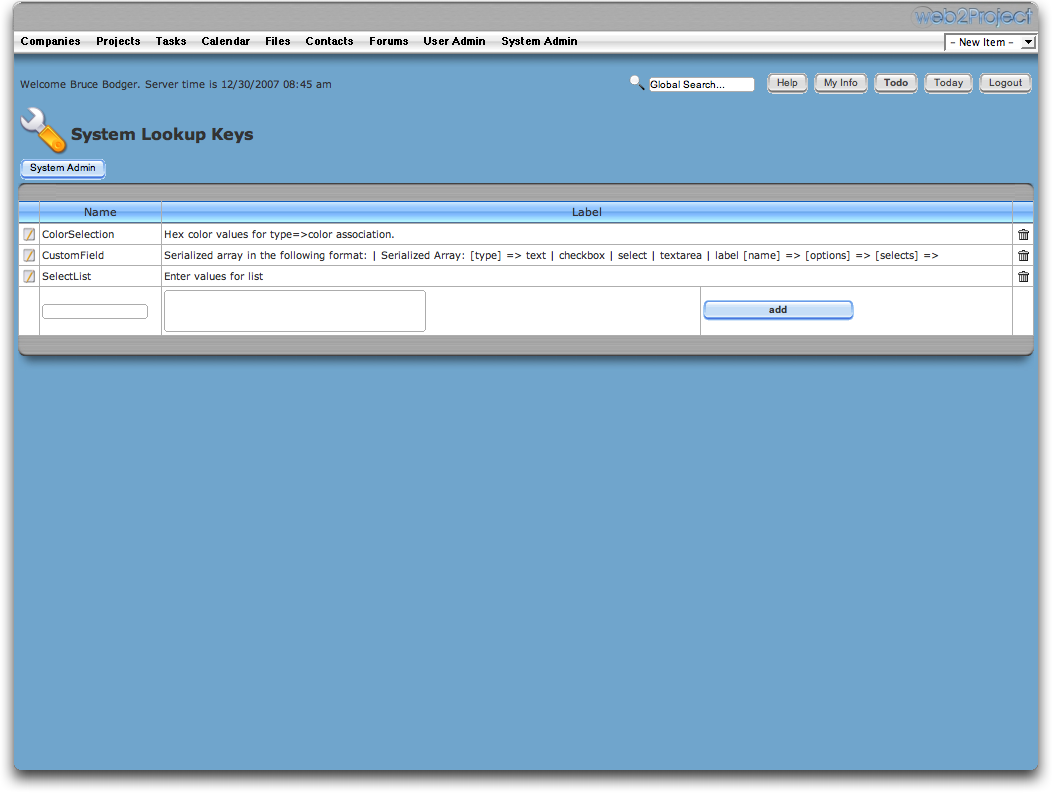
System Lookup Keys and System System Lookup values are used in combination when a lookup list or custom field or pre-set selection field is used.
Warning: Unless you are a programmer we strongly recommend that you do not modify this section!
System Admin System Lookup Values (syskeys)
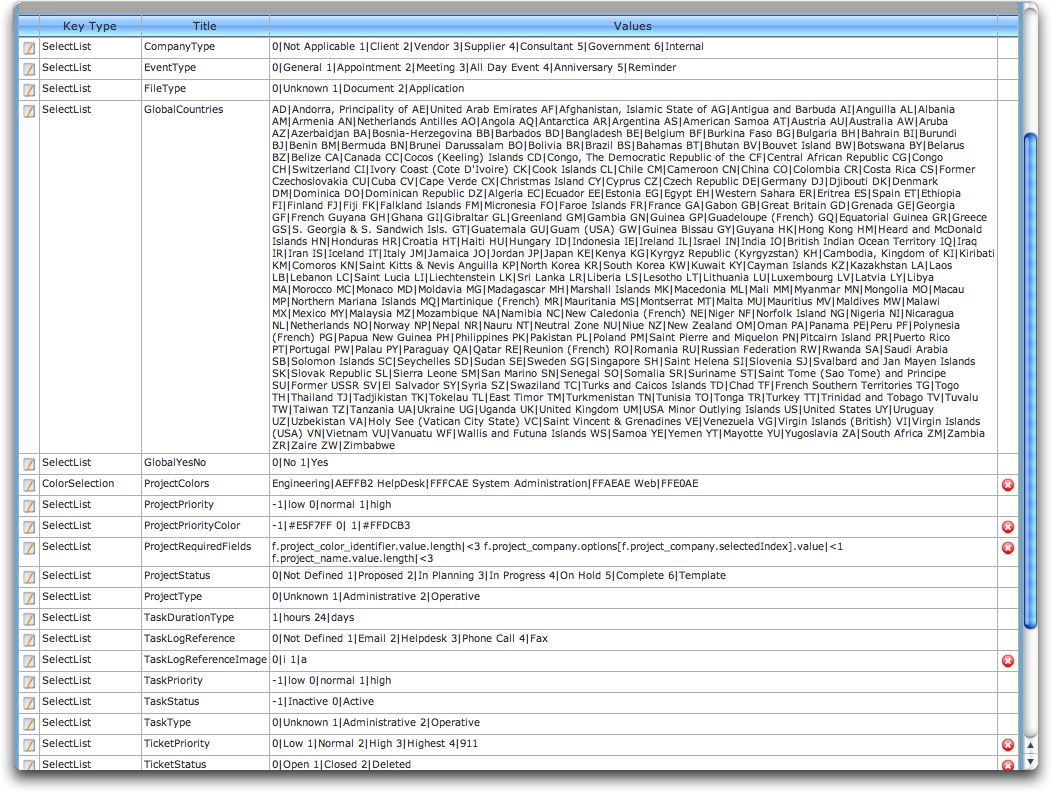
System Lookup Values are used in combination when a lookup list or custom field or pre-set selection field is used. This includes standard drop down listings and tabs such as the projects list page.
For example the project list page tabs are referenced in the System Lookup Values as “ProjectStatus”
0|Not Defined 1|Proposed 2|In Planning 3|In Progress 4|On Hold 5|Complete 6|Template
Changing these values will change the tabs according but note: You can not modify the All Projects, Archived, or Gantt tabs as these are hardwired by default.
It is strongly recommended you do not modify these settings unless you are comfortable with what you’re doing. Modifying the wrong system values could have undesired results.
System Admin Custom Field Editor List (custom_field_editor)
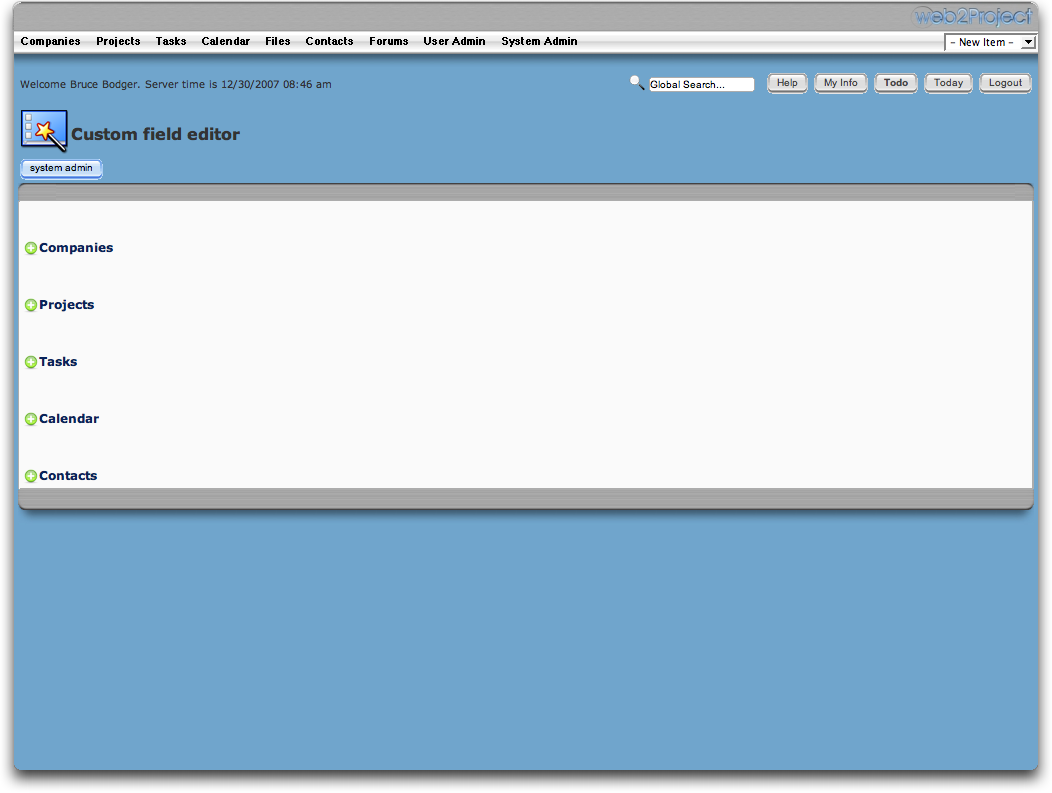
The Custom Field editor allows you to add custom fields to areas such as Projects, Task, Companies, and Calendar without needing to know programming.
System Admin Custom Field Editor Add/Edit (custom_field_addedit)

To add custom fields click on the custom field editor link in the system administration
- Click the green plus (+) icon to open the custom field editor for the corresponding module of your choice.
- Enter a Name for your field
- Enter a Description
- Choose the field type
- Specify wether it is visible
- Specify the order of appearance
- Use Html tags if applicable.
After you add your custom field you’ll see it appear on the list under the module you specified, in addition to the editor of the module.
System Admin Billing Code (billingcode)
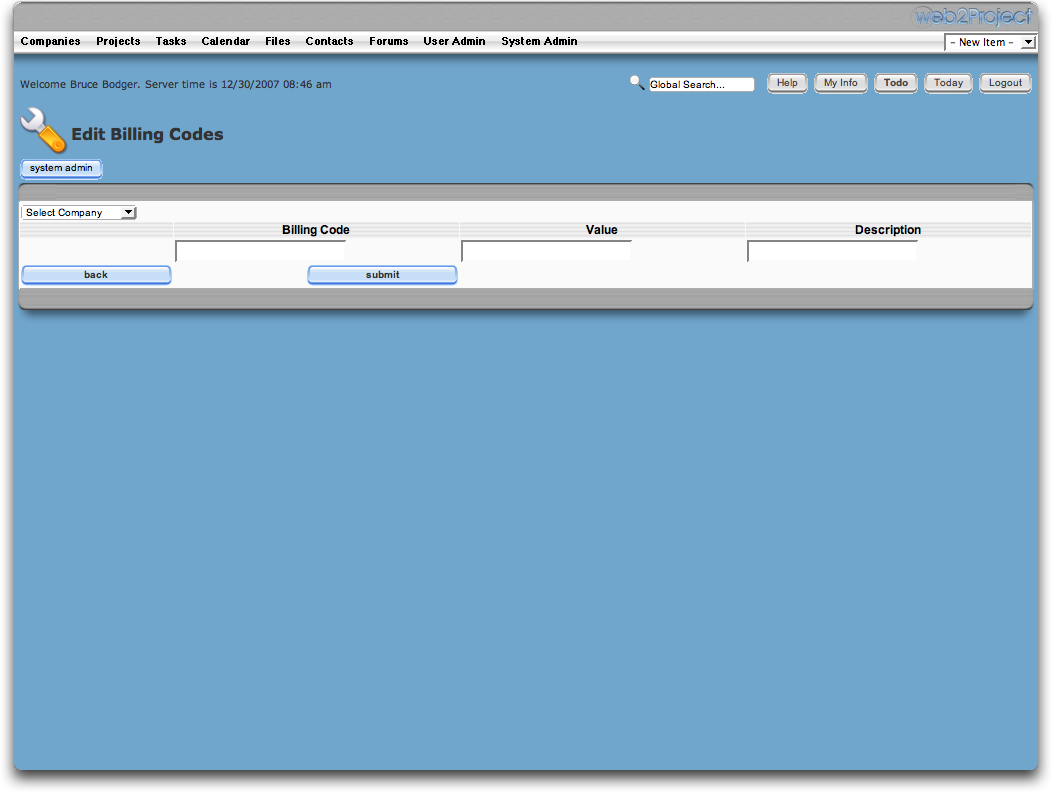
You can use billing codes to track cost in respect to time, mainly used when creating a task log for example.
Billing codes are usually an accounting code
Value is the dollar amount
Description can be the same as the code or something to easily identify.
When you store billing codes, they will be visible in the task logs cost code dropdown.
System Admin View Modules (viewmods)
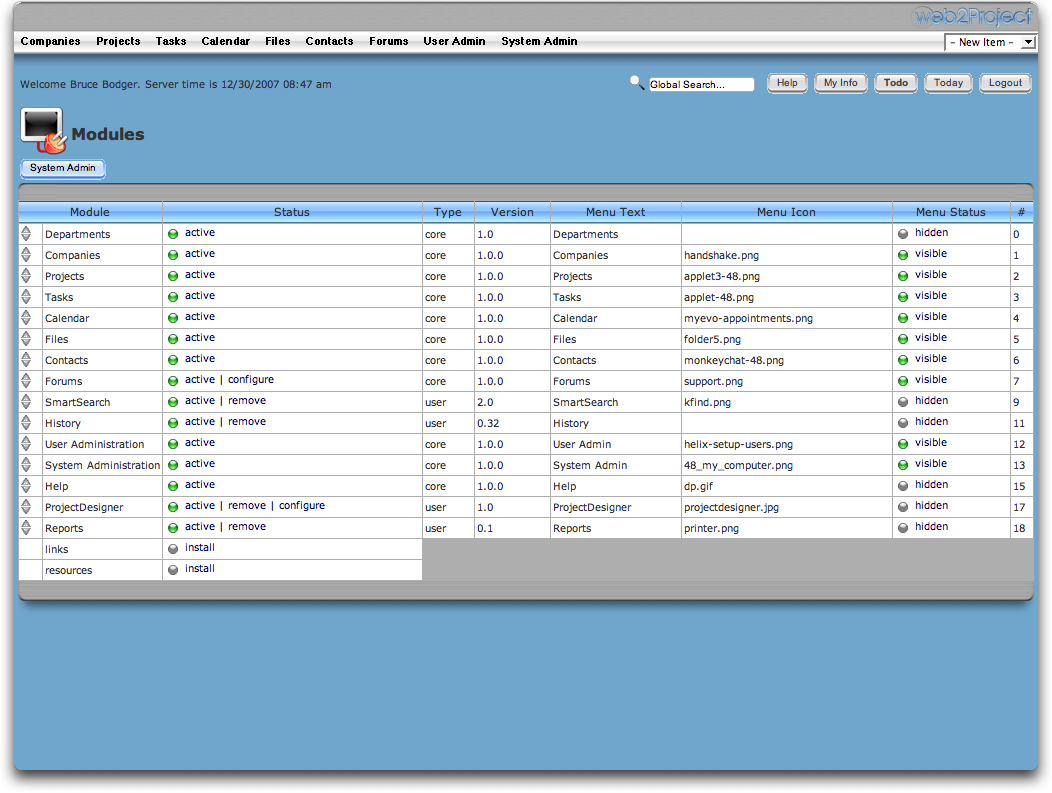
The view modules section allows you to view, edit, delete, change order of appearance and configure modules.
Modules are generally located in the web2Project/Modules folder and appear in this table.
The first column lets you move a module up or down. This will also have an effect on how the module appears in the menu when active or visible.
Show or hide a module by clicking on the Menu Status columns Hidden or Visible text.
Roles are an asset to the comprehensive permissions system built into web2Project. You can specify roles for specific types of users or users groups to allow or deny access to various features within web2Project.
Roles make it easier to apply permissions to a user or set of users rather than applying individual permissions to each user.
To create a user role for a group of users click on the User Roles link under the system administration menu.
You will see a table.
| Field | Description |
|---|---|
| Icons | Edit-Modify-Delete |
| Role ID | ID of Role |
| Description | Description of Role |
To create a new role give the role an ID in the textbox located at the bottom of the second column. Then type a brief description in the second textbox located last in the description column.
After you create a role, click on the lock icon to add permissions to it.
Visit the permissions page for more information.
System Admin Permissions Result Table (acls_view)
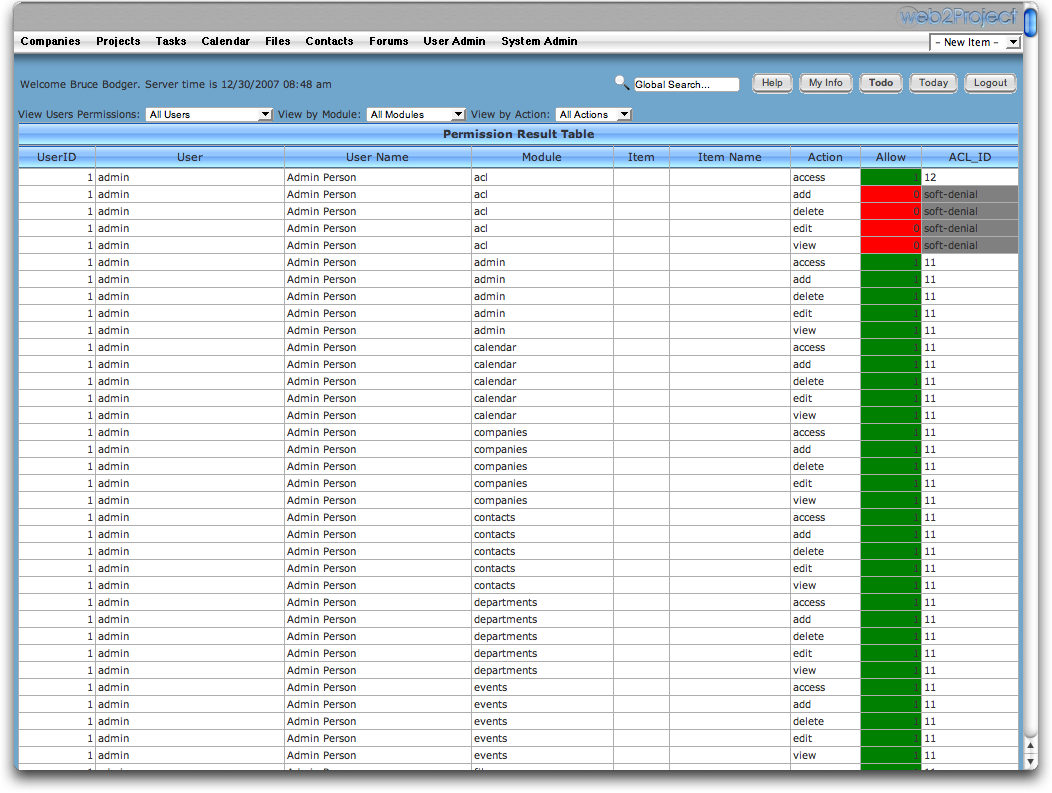
The permissions result table gives a more comprehensive look into the permissions for each. You can filter the view by user, module, or by action.
When you visit the page and select a filter it will display a table.
| Field | User ID | User | User Name | Module | Item | Item Name | Action | Allow | ACL_ID |
|---|---|---|---|---|---|---|---|---|---|
| Description | Automatic ID by System | Login ID | Actual Name | Name of Module | ID If Applicable | Name of Item | See Permissions | Allow(1) Deny (0) | ID of the ACL |
Configure web2project to use Active Directory accounts
Create a service Account, the account only needs to be a member of the domain users group in active directory in order to search ldap.
Go to the System Configuration of the Systems Admin page of web2project.
Under “User Authentication Settings”
User Authentication Method: LDAP (Change to LDAP)
Under “Users”
Activate External User Creation: Deselect the checkbox (This is not required)
Under “LDAP Settings” LDAP also allows standard login: (check the box)
LDAP Base DN : DC= peanutbutter,DC=com This would be your domain name in my example I used peanutbutter.com
LDAP Host: dc.peanutbutter.com Use the IP address or fully qualified domain controller name. example: dc.peanutbutter.com
LDAP Port: 389 (This default port used by AD)
LDAP Search User Password: Password for the user entered below
LDAP Search User: Use the user you created as the service account. You must use the full AD path to that user account. Be sure to use OU for an organizational unit and CN for a Container, CN would be used if your users were in the default “User” folder created when you install Active Directory.
LDAP Search User : CN=project,CN=Users,DC=peanutbutter,DC=com
LDAP User Filter : sAMAccountName=%USERNAME%
LDAP Version: 3
Now you can use your active directory usernames and password to login to web2project.
System Admin Import Contact (contacts_ldap)

The import contacts lets you import contacts from an LDAP Directory. This is more of an IT function and documentation will be forthcoming.